( Have you ever introduced your little ones to play bins? If you have, do they love them? In this article, we have our loyal reader and supermommy, Joyie to share with us about creating sensory food play bins.)
Ever since Miss J was young I have started creating little play bins for her. One of my favorite ways of creating a play sensory bin is by using edible , non toxic items such as pasta, salt, rice, flour, water and flowers. I kept many different types of containers , scoops of varies sizes, shapes and colors. It was really exciting to see Miss J ‘s curiosity and expression to the little fun bins I made for her to explore. It’s especially useful on a rainy day when we don’t get to go out to the playground to play or indulge in outdoor activities such as feeding the fishes in the lake gardens, going for a stroll while collecting different types of flowers, leaves and twigs or climbing up hills together.
Pasta play, baby pasta, penne pasta, spiral pasta, colored pasta

I bought a bag of spiral and penne pastas, poured into a big wooden box and added in buckets, shovels, scoops to mimic the scene at the beach. It was awesome as she was able to scoop up pasta, transfer it from container to container, touch and feel the texture and definitely had lots of fun. Occasionally took a few bites of raw pasta , but I know I wouldn’t need to jump off my seat and worry as it was edible and non toxic. After she tasted a few, she knew it was not meant to be eaten raw. So she never tried it again.
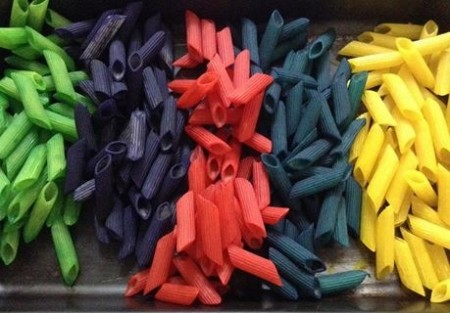
I made a slight twist to the penne pastas by adding colors to it. So I made a batch of green, purple, red, blue and yellow penne pastas. All you need is food coloring, dried pasta, zip lock bags, hand sterilizer. Firstly, divide your pasta into the zip lock bags. Then add in a few drops of hand sterilizer and a few drops of food coloring. Lastly, lock the bags and begin mixing the pasta and the colors. After you have completed it, pour it out on a tray and let it dry overnight. Once it is dry you can start creating many different things with colored pasta.
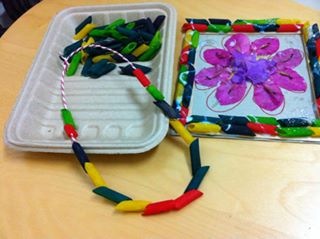
This is one of our creations with colored pasta. Miss J, learnt to string the pasta in and she made a necklace for me. Such a beautiful piece of jewelry. Our second project was a homemade photo frame which was made out of colored pasta borders and she pasted flowers which she gathered from our evening stroll in the garden. This picture of a purple flower in her first homemade photo frame was given as a gift to her dentist when she visited her. This are timeless handmade gifts , definitely something which cannot be bought of the counter.
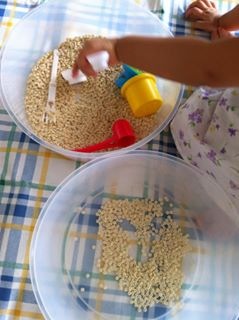
Besides exploring the large sized pastas, I poured out some mini baby Star shaped pastas for Miss J to play. This is more challenging as it is smaller and it really made her fine motor skills sharpen. It’s amazing how kids just love simplicity. Just 2 big round containers, a few scoops and colored cups for her to explore, makes her a happy toddler.
Spoon & ribbons
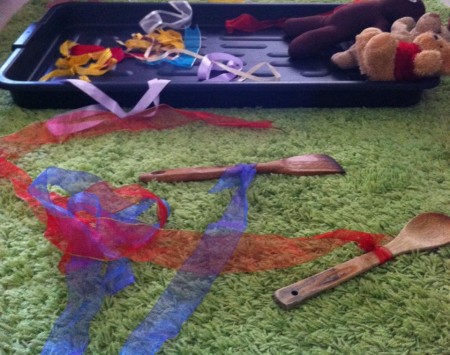

Ribbons and wooden spoons from the kitchen. This was one of her favorite play items. It was really simple. I got hold of my cooking wooden utensils and tied long silky colored ribbons on it. Miss J would play with the ribbons and pretend she was a ballerina or a gymnast twirling and making the ribbons swirl as she runs across the hall way. She invited invited her teddy bear friends to join in the fun.
Dough cloud dough, colorful cloud dough
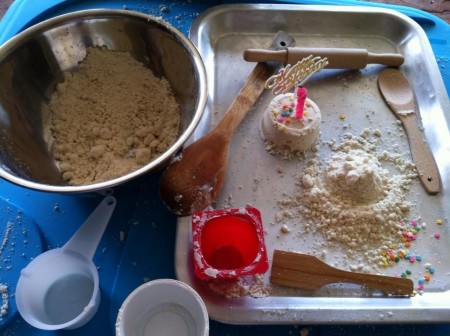
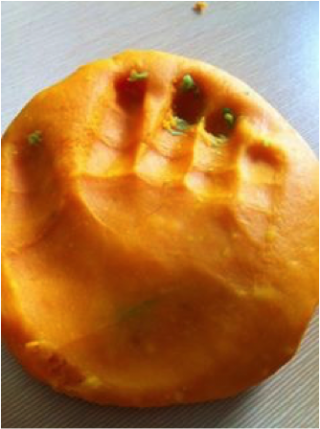
This is one of my favorites…. Cloud dough. Have you ever felt the texture of cloud dough? It is so different and really fun because you can make cake moulds out of this. I made a batch of cloud dough for Miss J to play baking and for her to create a birthday theme cakes. All you need is a big mixing bowl, measuring cups, plain flour and cooking oil. 4 cups of plain flour = 1/2 cup of oil. Optional items are your candles, decorations such as edible hearts and stars. Once you have measured the flour and oil , mixed it well until you have this fantastic cloud dough feeling.
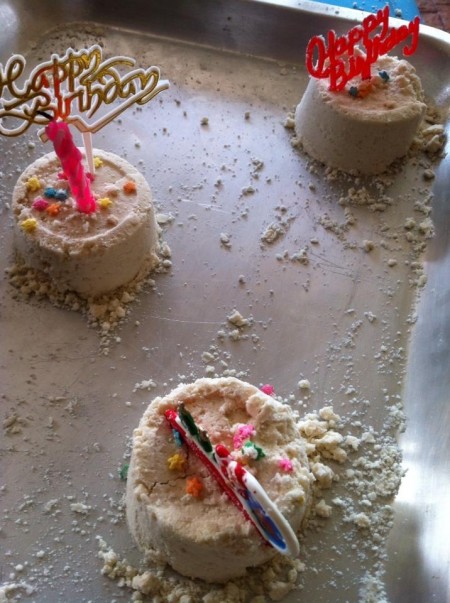
Then you know your are ready to start creating miniatures cakes. This is a fun activity as it teaches the toddlers and gives them an exciting time, decorating tiny little colorful sprinkles and stars and hearts and putting the candles on the cakes. Miss J absolutely loved it so much , she made herself miniature cakes, sang happy birthday and then smashed it and the cycle repeats itself over and over again.

On another occasion, I made a new batch of cloud dough but this time i changed the props and used the silicon cupcake moulds ( hearts, stars and butterfly) and added in the decoration edible hearts and sprinkles. Of course we had to have straws as candles to add in the excitement of making cloud dough make belief cupcakes and sing happy birthday.

This was so pretty , added in color to the cloud dough by using food coloring. It took some time to mix it up all nicely and evenly. It would have been better if I had powdered food coloring as mine was liquid base. But it was so much of fun, even attracted the eyes of adults to come and have a look at this colorful cloud dough sensory bin. I added in my hand made fondant flowers which I had in excess for the kids to play and decorate their cloud dough cup cakes. Fun! Fun ! Fun !
Salt play coarse and fine salt

Salt….salt…. Salt….
This is definitely something easily available, absolutely cost effective and guaranteed 100% fun. I bought bags of fine and coarse salt.
On a rainy day, I made a rainbow box and poured fine salt in it. Miss J had fun pouring salt through the funnels which I recently bought into yoghurt containers.

This is a coarse salt play bin, I used about 10 packets of coarse salt and poured it into the round container. Added in some of my old pots and pans and cooking utensils. Miss J loved playing cooking nowadays and it was just exciting for her to feel the texture of coarse salt and play make belief as a chef.
Play dough natural ingredient
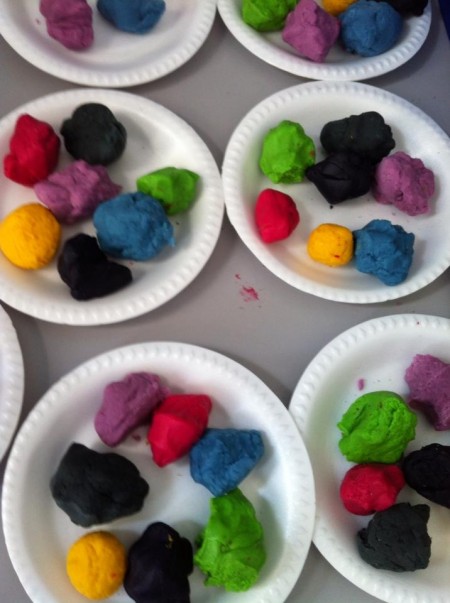
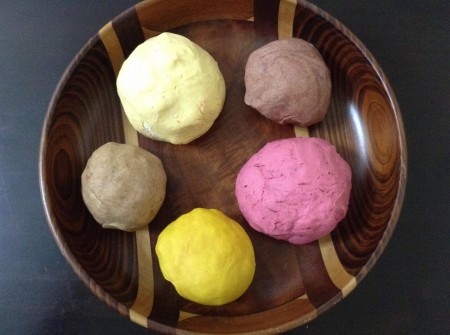
Play dough is Miss J’s favorite at this point of time. I usually made homemade play doughs for Miss J. It is really simple. All you need is 2 cups plain flour, 1/2 cups of salt, 3 tbsp oil, 3 tsp cream of tar tar, 2 cups of boiling water and food coloring. I attempted to make natural homemade play dough by using beet root, turmeric, cinnamon, Chinese 5 spice powder and carrot. It turned out really nice. After your child is done playing with it, you can store it in an airtight container cling wrapped in the fridge. It last for a month or two. Salt is the most important ingredient in the play dough.
Flower soup play

What do we do with flower petals?
We make fairy flower soup …
Miss J loves a combination of water and splashing. I placed a container full of water and added in flower petals , all she did was stir and stir and stir. She was fully satisfied with it. Funny girl. After that, she transferred the flowers and water into the yoghurt containers I prepared for her. She came running to me telling me to drink my soup. This is my cute and cheeky girl!
Fruit and vegetable play bin

This is one of my methods of teaching Miss J the different types of food and fruits. Teach her to name the fruit and vegetables. Then we play a game of ‘I SPY’… I would say I SPY an Apple, then she would grab and apple for me and the game goes on. Some of the fruits can be cut into half and this trained her to use the wooden play knife to practice her cutting skills. In the supermarket while doing grocery, Miss J can recognize and name the fruits and vegetables. Now she helps me make fruit juices at home.
(Written by Joyie)
The post Stimulating My Child Senses appeared first on DoktorBudak.com.


